1 – Substitution
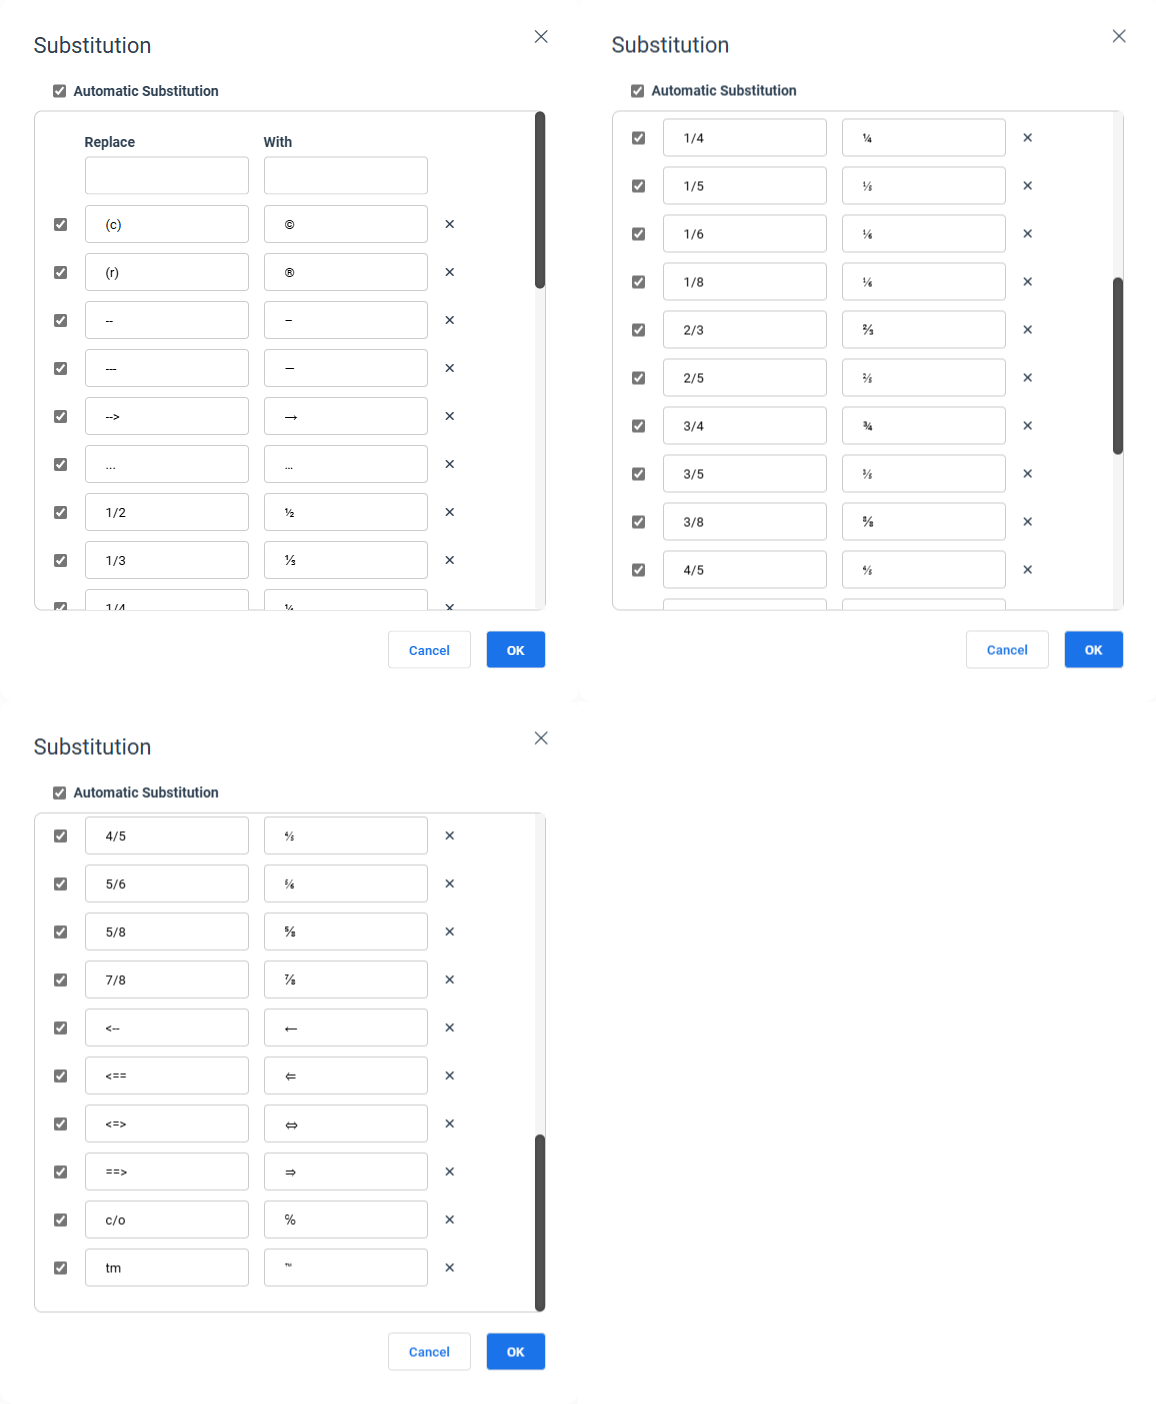
A window of the Substitution tool will open, displaying a table with two main columns, where you can modify, create, or delete substitution keywords, such as texts, symbols, and other characters of your choice. You can also enable or disable all substitutions or only specific keywords that will be used or not. This is useful for expanding acronyms and abbreviations that you frequently use in your documents.
Let’s create shortcuts that, when typed, will automatically complete each defined keyword:

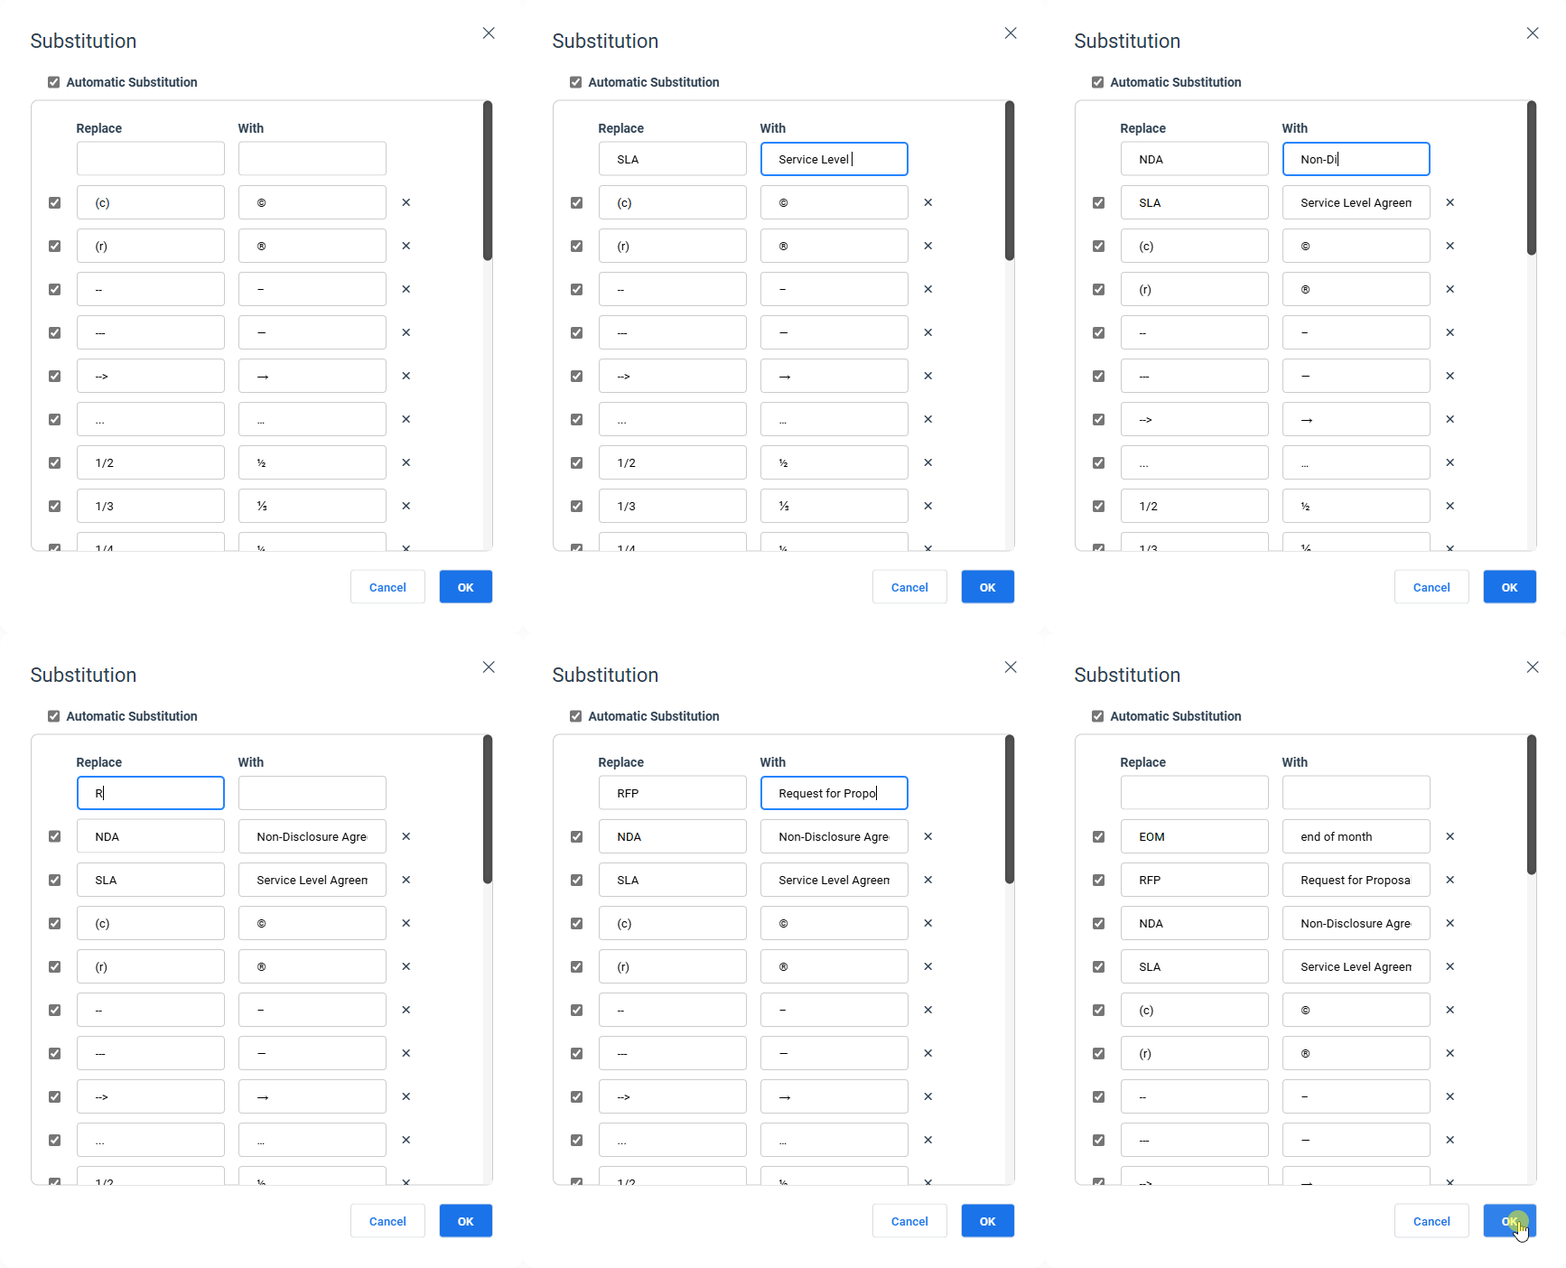
In the “Replace” column, add “SLA” and in the “With” column, add “Service Level Agreement”.
Similarly, change “NDA” to “Non-Disclosure Agreement”, “RFP” to “Request for Proposal”, and “EOM” to “end of month”, as shown in the table below:

And we will create the following sentence:
“The parties agree to the terms outlined in the SLA, ensure all conditions in the NDA are met, and submit the final RFP by EOM.”
Which will be automatically replaced by:
“The parties agree to the terms outlined in the Service Level Agreement, ensure all conditions in the Non-Disclosure Agreement are met, and submit the final Request for Proposal by the end of month.”

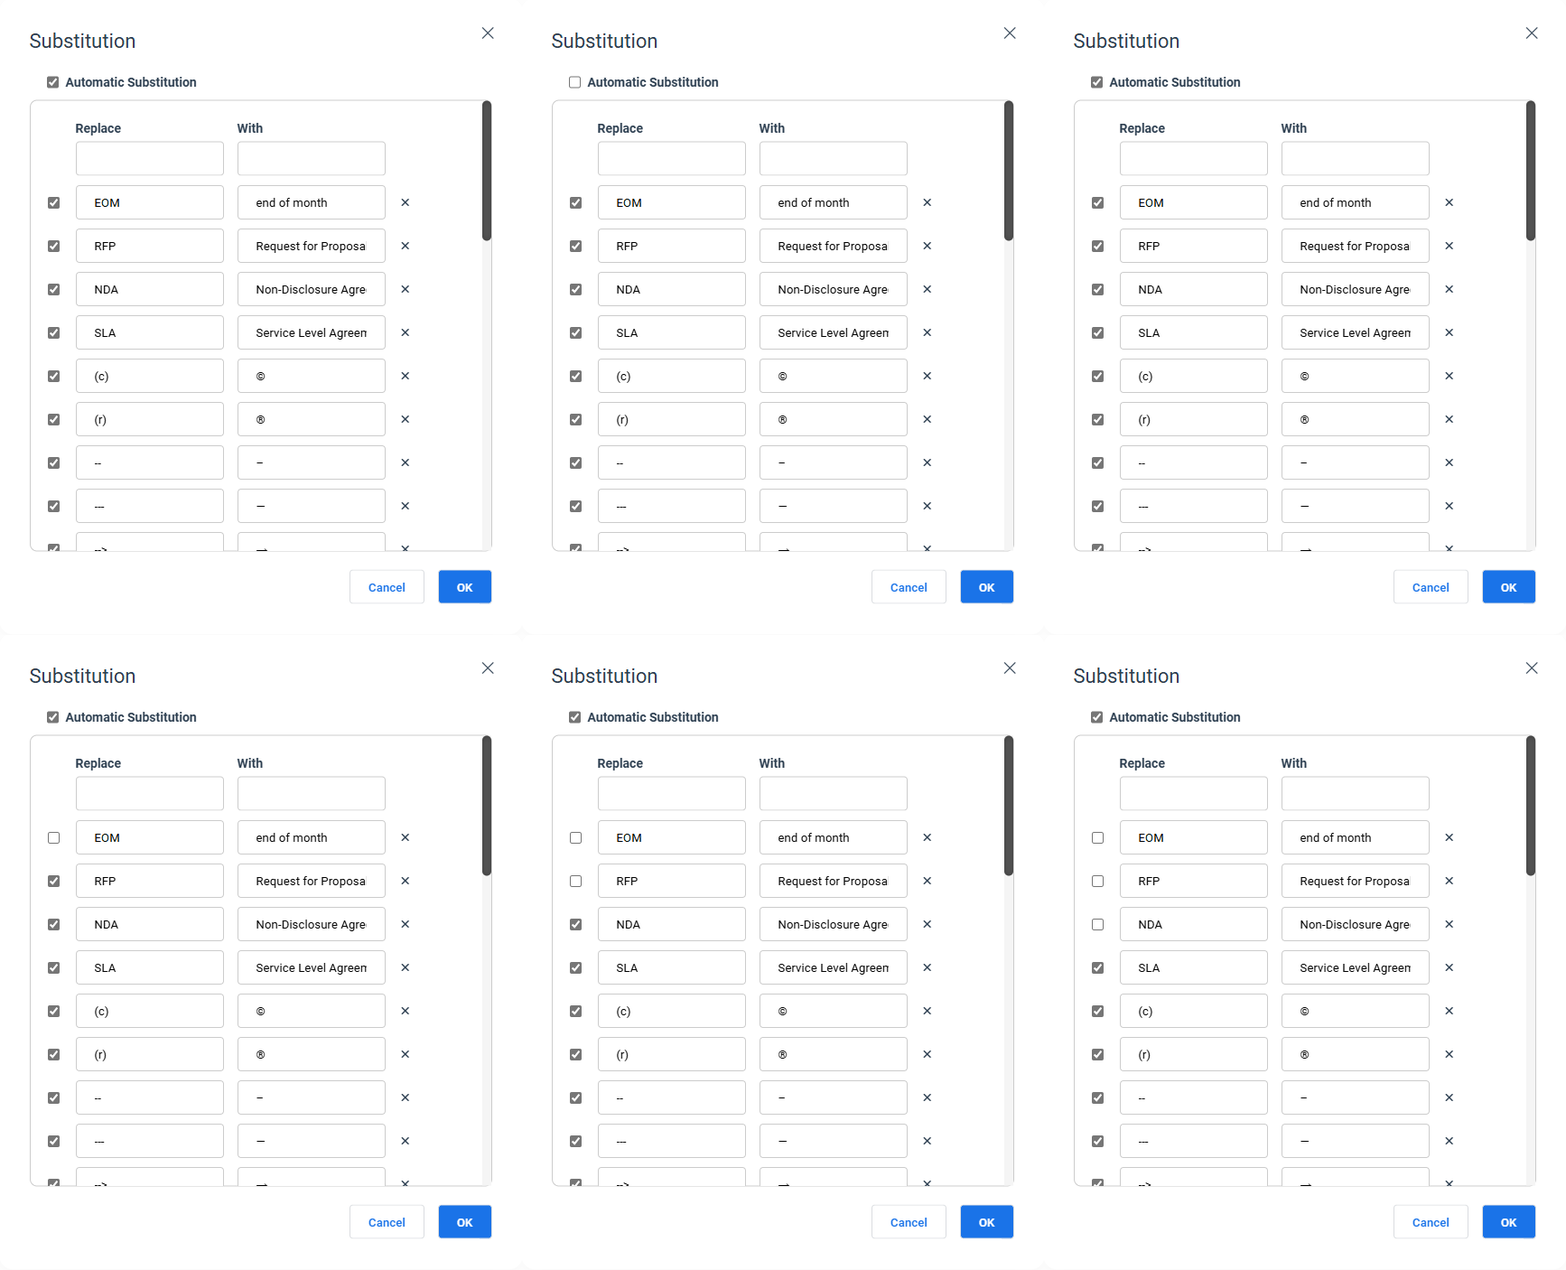
We have the option that when typing SLA, NDA, RFP, and EOM, and using the BACKSPACE key and the SPACE bar, the text returns to its previous state, not being replaced by the tool.

If you want to disable Automatic Substitution, use the checkbox in the “Automatic Substitution” option. If you want to disable or enable only specific substitution words, use the corresponding checkboxes.

Note: When using the Substitution Tool, the substitution settings are saved only in the browser in use. If you log in from another browser or from another computer, you will not have access to the Substitution tool settings.
Key Benefits
- Increased Productivity: Quick expansion of frequently used terms and phrases
- Error Reduction: Consistent use of correct terminology and spellings
- Customization: Tailor substitutions to specific business needs or industry jargon
- Time-Saving: Reduce typing time for long or complex terms
- Flexibility: Easy to enable/disable substitutions as needed
Final Considerations
The Tools Menu, particularly the Substitution feature, in docu2.me offers significant advantages for document creation and editing within the Salesforce environment:
- Enhanced Efficiency: Automate repetitive typing tasks, saving time and reducing fatigue
- Consistency: Ensure uniform use of terminology across documents
- Adaptability: Easily adjust substitutions to match evolving business language
- Seamless Integration: Utilize advanced editing features without leaving Salesforce
- User-Friendly: Simple interface for managing substitutions
By leveraging the Substitution tool, users can streamline their document creation process, maintain consistency in their Salesforce-related documents, and reduce the likelihood of typographical errors. This feature is particularly valuable for teams working with specialized terminology or frequently used phrases, enhancing overall document quality and professional presentation within the Salesforce ecosystem.
2 – Documents Settings
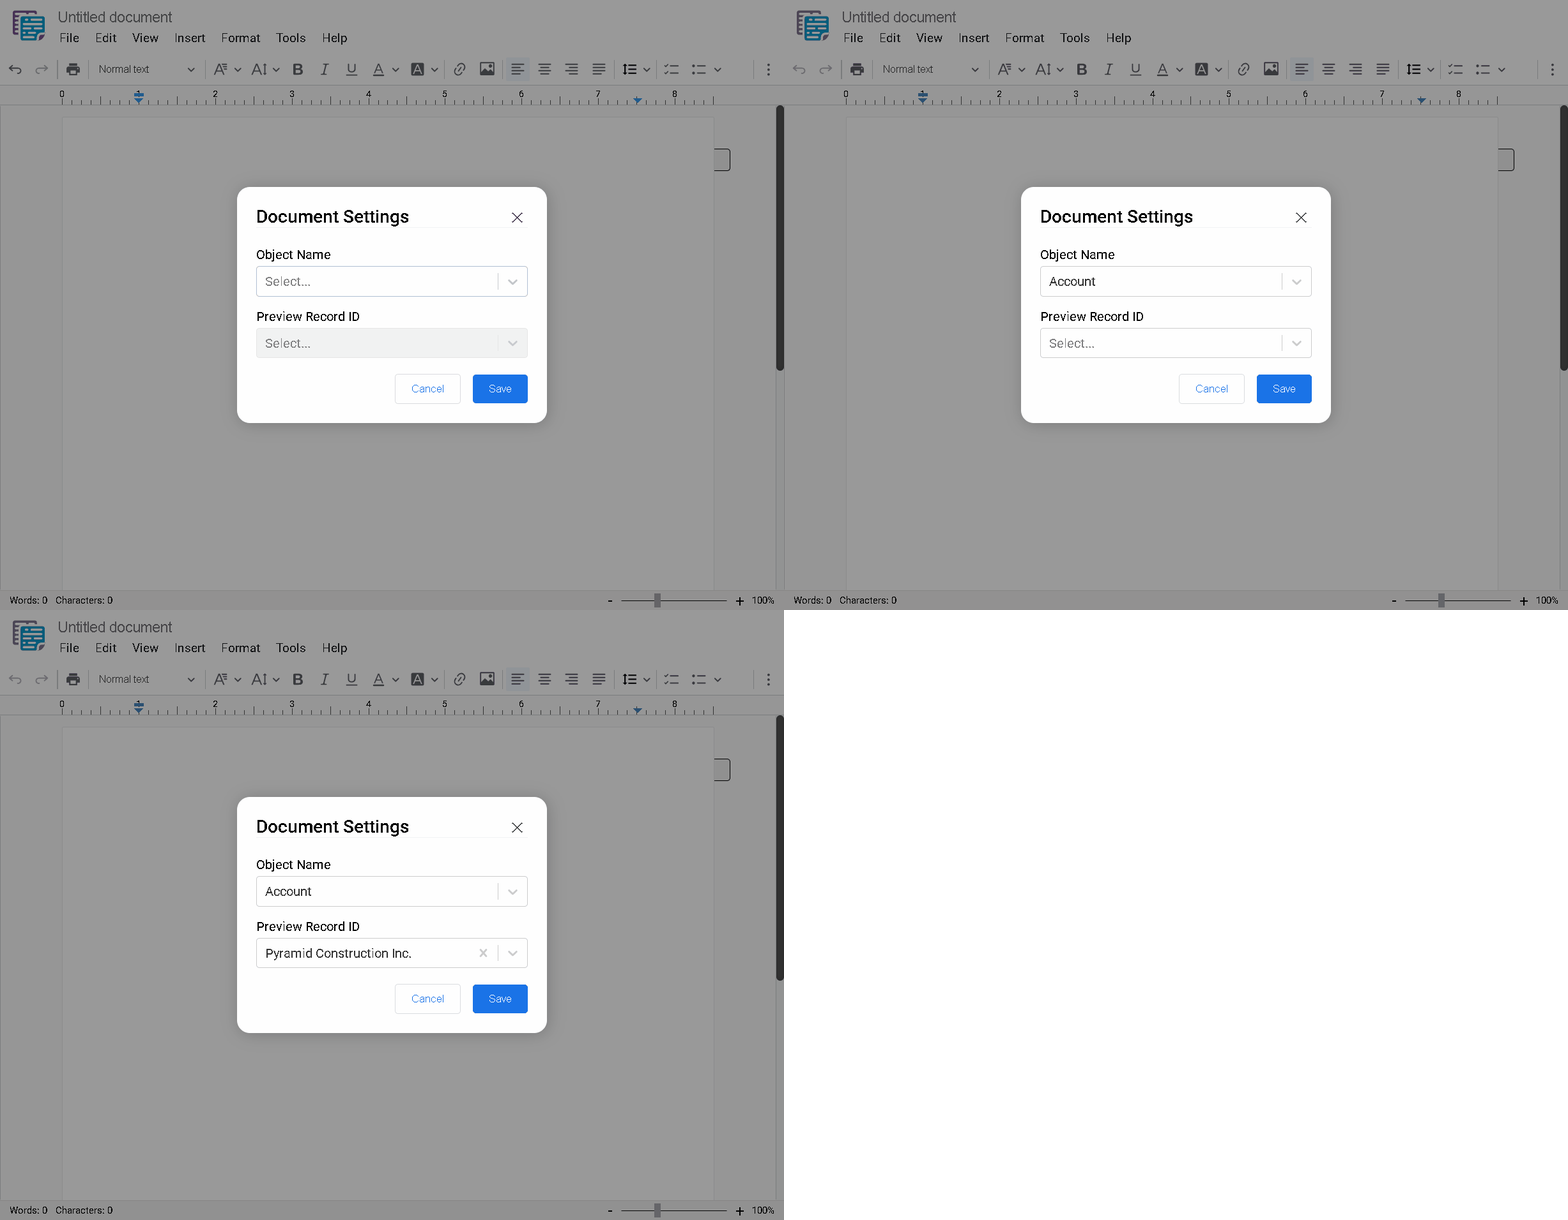
Document Settings is a crucial menu that defines which Salesforce object and record the document will work with, essential for creating dynamic documents with specific record information.
To access the Document Settings, go to the top menu, click on Tools, and in the dropdown menu choose the Document Settings option.
- Menu: Access the main menu.
- Menu Tools: Click on “Menu Tools“.
- Document Settings: In the dropdown menu, select “Document Setting“.

Configuration Options
- Main Settings
- Object Name
- Select the Salesforce object to work with
- Example: “Account”
- Preview Record ID
- Optional: Specify a particular record
- Example: “Pyramid Construction”
- Object Name
- Usage Scenarios
- Basic Configuration
- Select only Object Name
- Use for general object templates
- Detailed Configuration
- Select both Object Name and Preview Record ID
- Use for specific record-based documents
- Basic Configuration
Practical Example

- Setting Up Account Document
- Object Selection
- Choose “Account” as Object Name
- Record Specification
- Enter “Pyramid Construction” as Preview Record ID
- Object Selection
- Results
- Document will:
- Work with Account object data
- Use Pyramid Construction’s specific information
- Access all related records and fields
- Document will:
Important Notes
- Initial Setup
- Required when creating a new blank document
- Essential for dynamic field functionality
- Determines available fields and relationships
- Document Behavior
- All dynamic content will reference:
- Selected object’s fields
- Chosen record’s specific data
- Related record information
- All dynamic content will reference:
- Best Practices
- Configure settings before adding dynamic content
- Verify object and record accessibility
- Test document with different records if needed
Benefits
- Flexibility
- Work with any Salesforce object
- Access specific record data
- Utilize related information
- Organization
- Clear document context
- Structured data access
- Consistent information flow
Implementation Tips
- Before Configuration
- Identify required object
- Determine if specific record needed
- Check user permissions
- After Configuration
- Verify settings
- Test dynamic field access
- Confirm related record availability
Conclusion
Document Settings is a fundamental feature in docu2.me that establishes the foundation for dynamic document creation by defining the Salesforce object and record context, ensuring accurate and relevant data integration in your documents.